Viser innlegg med etiketten Fuzzy Cutting. Vis alle innlegg

fredag 2. oktober 2020

Kjære Konfirmant - Dragekort

På tide å skrive litt norsk i denne bloggen også.. Jeg er så utrolig heldig å få lov til å være medlem av Papirdesign sitt designteam, og det fortjener et norsk spåklig innlegg! :D 

I dag deler jeg mitt første innlegg på bloggen deres, så da deler jeg det her også. Dette burde jo vært et innlegg smekkfullt av alle de deilige nyhetene som Papirdesign har kommet med nå de siste ukene, men mine nyheter stod værfast i Nordnorge i 1,5uke, slik at jeg ikke har fått kommet i gang med å organisere noe enda dessverre. Men jeg har noe annet å by på. 

Jeg har aldri laget så mange konfirmasjonskort som jeg har laget i år, så jeg har lyst til å dele et av konfirmasjonskortene jeg har laget. Det finnes ingen som har så masse flott til konfirmasjon som Papirdesign, så her er det bare å plukke godsaker fra øverste hylle. 


Jeg har laget et dragekort! De er så morsomme å lage, i tillegg til dekorative og spennende å gi bort. 

Masse lag på lag med mitt favoritt produkt - Tekstklistremerkene! Jeg elsker dem! 

Inni selve kortet, med pengelomme :) 

Produkter brukt på kortet: 

Papir
PD 1900324 - Håpefull - Ven & Vakker
Dies
Blomster
Hortensia - Rosa
Pynt
Tekstklistremerker

Ha en fortreffelig helg! 
Scrappeklem fra Yasmin

fredag 11. august 2017

Steampunkish Card - DT Maya Road

Heellloo!! Finally something is happening on my blog, twice in a week! That's not to shabby. Today I have a Steampunkish card to share with you. I made this card AGES ago for Maya Roads CHA. But I taught today was a good day to share it. I haven't shown it anywhere else before today.

I used papers from Fleur Design on this card, love those papers. It hurt a bit to cut in them. Hahaha.. I used my sewing machine and stitched around the egdes. Added some layers with Maya Road tags and used modeling paste on top.

I made a fun face by using Maya Road glasses and moustache on top of the lightbulb. I also added a button and lightbulb transparency. On top I splashed abit with glimmer glam - stiletto from Tattered Angels. On top of the glasses and moustache I added a bit of Inka Gold - Old Silver.

I'm joining in these challenges with my card: 


Thank you so much for stopping by my blog today! So happy you where here :) 


tirsdag 27. september 2016

Forever in Love with You - Layout DT Flying Unicorn

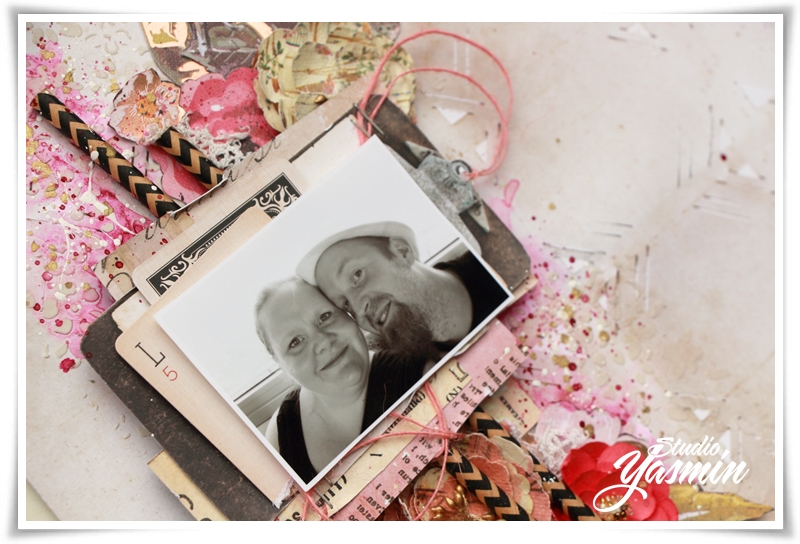
Hello my sweets! My scrapping is moving along slowly but I finally made something for the Flying Unicorn with the September Kit. The kit was so beautiful with all these lovely autumn colors and Prima's marvellous Rossibelle Collection.

I manily used the kit, but I also added some elements from my own stash, like the straws and the Prima playing cards witch is my new favorite.. they are just soo awesome!

I fuzzy cut loads of elements out of the Rossibelle papers. I also added some layers cut out from the different papers in the collection. I used modeling paste in the background. I added some of the flowers and some twine. I painted and splashed a bit with some Colorbloom and dylusions white.


There's a new kit for sale in just a couple of days. Make sure to get yours while you can. They are limited :)

Thank you so much for stopping by my blog today and make sure to come back tomorrow. I will have another share for you. Hugs!

onsdag 20. juli 2016

Maritime Card - DT Scrapberry's

Hello my lovlies! Today I'm up on the international Scrapberry's blog and I've pulled out some of my favorite papers from Scapberry's "Holiday Romance" and made a maritime card.


I did some serious fuzzy cutting on this.. I love to fuzzy cut and I love those papers I can find some elements with in the paper to use. These are perfect for that.

I used a whole bunch of Scrapberry's products on this, all from papers to flair buttons and chipboard.  The sentiments means "Happy Birthday" and are stickers from a Norwegian company called Papirdesign.

I also embellished with Finnabiar Art Stones and real shells picked from the beach near my house. The cheesecloth I misted with some Color Bloom.

I'm joining in these challenges with my card: 

Thank you for stopping by my blog today and if you would like to see more fantastic creations with Scrapberry's products. Please head on over to their blog. See ya! :) 

tirsdag 5. juli 2016

Summer Challenge - Scrapberry's

Hi everyone! There's a new challenge up on the Scrapberry's blog and this time you can make anything as long as it has a summer feel to it.

I used the papers from the "Sweetheart" collection for my card. It has these awesome papers you can fuzzy cut and I really like fuzzy cutting. So I cut out this pretty girl and added some rhinestones and a banner.

 I'm joining in these challenges with my card: 

Thank  you so much for stopping by my blog today! :D 


onsdag 22. juni 2016

Capricorn - Layout DT Scrapki-Wyzwaniowo

It's 8 days left of the june challenge over at the Scrapki-Wyzwaniowo blog. This month is all about Horoscope witch I must admit was a pretty difficult challenge. But a challenge should be a challenge. This time I made a layout.

I've played with loads of medium and the newest 7dots Studio collection "Fortune Teller". I must say that Fortune teller is my favorite of the new collections.

Like I said the challenge is about "Horoscope". You can make whatever you like and you can use the theme in the way you like aswell. This is what I came up with:

My star sign is Capricorn so I decided to make a layout about it. I misted with Color Bloom "Antique Gold" over a stencil, then used more stencil work with Viva Decor Gold paste. I did a lot of splashing with more colors like Color Bloom "Deep Teal" and Glimmer Glam "Stiletto" from Tattered Angels.

I've used metall embellishements from Finnabair and Prima. Including metal buttons from My Minds Eye.

Let's check out this month prizes: 


Sponsors:
European manufacturer, that create scrapbooking lines consist of papers, stickers, die-cut elements, stamps, stencils and chipboard. Creative and passionate crew works to bring you inspiring products, that will make your creativity blooming. 


UmWowStudio is a family owned business out of Las Vegas, NV. The production is specialized in laser cut chipboard embellishments and masks for the paper crafting and mixed media community.


First Prize
sponsored by 7 Dots Studio


Second Prize
sponsored by UmWowStudio


Random Prize

sponsored by UmWowStudio


 Good luck to all of you!

Please check our rules here. The most important rules:
1. You can create any project you want, unless it is specified in challenge rules. 
2. Each person can enter with one project per month. 
3. To enter the challenge please: 
- create a project, 
- publish it on your blog together with a link to our challenge and a visual reminder for our challenge 
- add a link to your blogpost (not a whole blog) using Inlinkz tool - you will find it below each challenge and in right column of our blog.
The lightbulbs are fuzzy cut out from a Prima paper and I also did some stamping with primas awesome background stamps.

Thank you so much for stopping at my blog today :) Would love to hear what you think. 

mandag 30. mai 2016

Matchbook Card Tutorial - DT Flying Unicorn

Hello Everyone. Today is my day over at the Flying Unicorn blog. It's a long post, so I've decided to make it into two posts. I'm starting with my video tutorial - a matchbook card! These are so fun to make and are fantastic as mini albums, and a card that's a bit more than just one page.

I've used the Salvage District line from Prima Marketing with loads of flowers. The stamp is from Kort & Godt.

I fuzzy cut some images from the collection. I love to fuzzy cut, it just gives you so many elements to work with. If you want to see how I made my card please take a look at my video.


Here's a look on the accordian inside: 


You can do so much with the accordian inside, add sentiments, pockets, photos, poems or some well said words the recipient.


I'm joing these challenges with my card: 


Thank you so much for stopping by my blog today. Would love to hear what you think :)

fredag 4. mars 2016

Moments - Layout with Video Tutorial - DT Flying Unicorn

Hello Everyone, I'm up on the flying unicorn blog today with a layout and a video tutorial showing you how I made it, playing with the march kit of the month.


This kit time the kit is a bit different since it's just one kit including all the stuff you like. It's a bit of everything from the past 4 kits put into one. Let's take a look at the kit:


It's a gorgeous kit right? So much goodies.. here's the layout I made using these products: 

The layout is of me and my youngest son at the hospital when he was just a few weeks old. He was born too early so we had to stay in the hospital for a month after he was born. I've used papers from Studio75, and paints from Prima and 13@rts. 


Here's the video tutorial of the layout:


I've used papers from Studio75, Flowers from Prima and the hearts are made with Prima's adhesive rub-ons and gold foil on top. I also added some chipboards from Crafty Moly to my background. 


I've used different background techniques and stencil from 13arts. Chipboard word - "Moments" is also from 13arts.

Thank you so much for stopping by today! Make sure to visit the Flying Unicorn forums for more inspiration and great shopping :)

torsdag 11. februar 2016

Sweet Vintage Tag - DT Maya Road

Today it's my day over at the Maya Road blog, and I have a sweet tag to share with you. I made this when I was at a crop this weekend. I love going to crops! Usually I teach a bunch of classes and this time wasn't any different. I try to get a load of stuff done, but it was difficult this time. But at least I got to create this :)
 I made this with LemonCraft papers and Maya Road and Prima embellishments. I do love creating tags. So much fun not staying inside the "lines" :)


I used the deer resin and small flowers from Maya Road as accents to my tag. I also added a bit of heart ribbon on the top. Love the vintage feel over the ribbon. I fuzzy cut som butterflies and other details out of a LemonCraft papers. Love these papers. So innocent and sweet. 

Some close ups of my project. ;)


Thank you so much for stopping by me today. If you'd like to see more lovely projects useing Maya Road products, please head on over to the Maya Road blog :)

torsdag 21. januar 2016

Memories - Layout DT Flying Unicorns

Back again today to share with you a layout I made with the Flying Unicorns January Kit of The Month. The kit for February are up for pre-order at the store. So go pre-order yours today! IT IS AWESOME!
I've played with papers, mist, chipboards and stickers from 13@arts on my layout. Here are me and my good friend Mia at Blarney Castle, Ireland. Oh what a good day that was.

So I added loads of stamping with the stamp that came in the Main Kit, splashed loads of color with the mists and also white dylusions mist. Added loads of flowers from Prima and a bit of old curtain I had laying around. :) A paintbrush and some wire string and that's about it!

13@rts came out with this lovely valentine paperline and these super cute word stickers. Thought this sticker fitted great on this page :)

So if you haven't allready checked out the kits.. Please do! So much value for money! :) 
Thank you so much for stopping by today :)

onsdag 6. januar 2016

Happy, Moments, Captured - DT Scrapberry's

It's my day over at the Scrapberry's blog, and I have made a layout I'd like to share with you. It's not often I get to snap som photo's of my oldest son, so these photos are precious to me.

I've used the one of the new collections from Scrapberry's  - "Photo Archive". These papers are awesome and I love the vintage feel.


When I made my tag I should a couple of days ago, I had a cut a little piece of paper out of 3 new sheets of paper. So I thought I would put them together to make one page. I glued them together. I stamped a bit with different background stamps and splashed with white dylusions picket fence mist.

I used embellishements from different collection like the automobile collection. and Wind of travel.

The beautiful button is from the "Holiday Romance" collection. I also added some gems. 

If you'd like to see more  projects with Scrapberry's embellishements and papers. Please head on over to the Scrapberry's blog. Thank you so much for your visit! 

søndag 8. november 2015

Bird Card - DT Scrapberry's

Back again today with a new card for you! I've made this as DT for Scrapberry's new challenge. This month it's all about the fuzzy cutting. I love - love - LOVE fuzzy cutting.


This time I've use the Birds of Paradise collection from Scrapberry's. The frame is from Wycinaka and the stamp from Norsk Stempelblad - a norwegian stamp magazine.

I've used Scrapberry's embellishments like the bird house, feather and pearl swirl. The beautiful purple flowers are Scrapberry's. Ther rest are from Prima. I love finishing off my cards with microbeads and a bit of gesso.


Isn't that Birdhouse the cutest ever. I love the little heart on it. I hope you will join us in the Scrapberry's challenge this month - please check out the details here:

Myself I'm joining in these challenges with my card:
Thank you so much for stopping by me today.. Be sure to make it back... My catching up days are not over yet.. :) :)


fredag 24. juli 2015

It's your Story - Layout DT Marion Smith

Hello everyone! It's my day over at the Marion Smith Designs blog and I've made my first video tutorial for MSD! Soo excited! Marion Smith has gorgeous paper and embellishment. Not to forget that Colorlab is SO fun to work with! :)

I've used papers for the "Posh" Collection. I've also used Junque and gems and Marion's beautiful flowers that match the collection! She also has some that's easy to color like you want them with colorlab. 

This is a picture of some of my family members. I do love them on that motorbike! So awesome. I did loooads of stamping, gesso's and colorlab on this. I work loads on my background this time. I've fuzzy cut all the paper from the Posh collection and added the die-cuts to my page. If you'd like to see how I made this layout, please take a look at my tutorial video down below. :)


The colors I used in this video is Tea Stain, the recipe is in the booklet you get when you buy colorlab. I also used a color I call dirty pink witch I made myself. I took basis of one of the pink recepies you get and added a bit of brown. :)
Look at that beautiful flower! The birds nest is a junque and gem from MSD, also the large Rhinestone. Gorgeous! :) The stamps used are mainly from Marion Smith Designs. Go check out all their products here.

Thank you so much for joining me today and I would looove a comment on my project!