Viser innlegg med etiketten Twine Cording. Vis alle innlegg

lørdag 12. desember 2020

Pakkelapper og kort - DT Bikuben

Herlige lørdag! Det er tolv dager igjen til jul, fortsatt tid til å lage både pakkelapper og kort. Jeg har laget julekulekort og pakkelapper med den nye Maja design serien og Stamperia Chipboard. 

Er du som meg, som ikke liker å fargelegge masse stempeltrykk? Da er disse chipboardene fra Stamperia perfekte! Herlig julete med masse flotte detaljer. 


Denne julekulen har jeg stanset ut, men det finnes mange gode løsninger for å ordne noe lignede selv, ved å klippe litt. Embosset kantene med hvitt embossing pulver, samt frantage chunky embossingpulver for å lage perle effekten. 


Om det står noen på engelsk på av figurene man må ha lyst til å bruke, kan man bruke et klistremerke på toppen! 
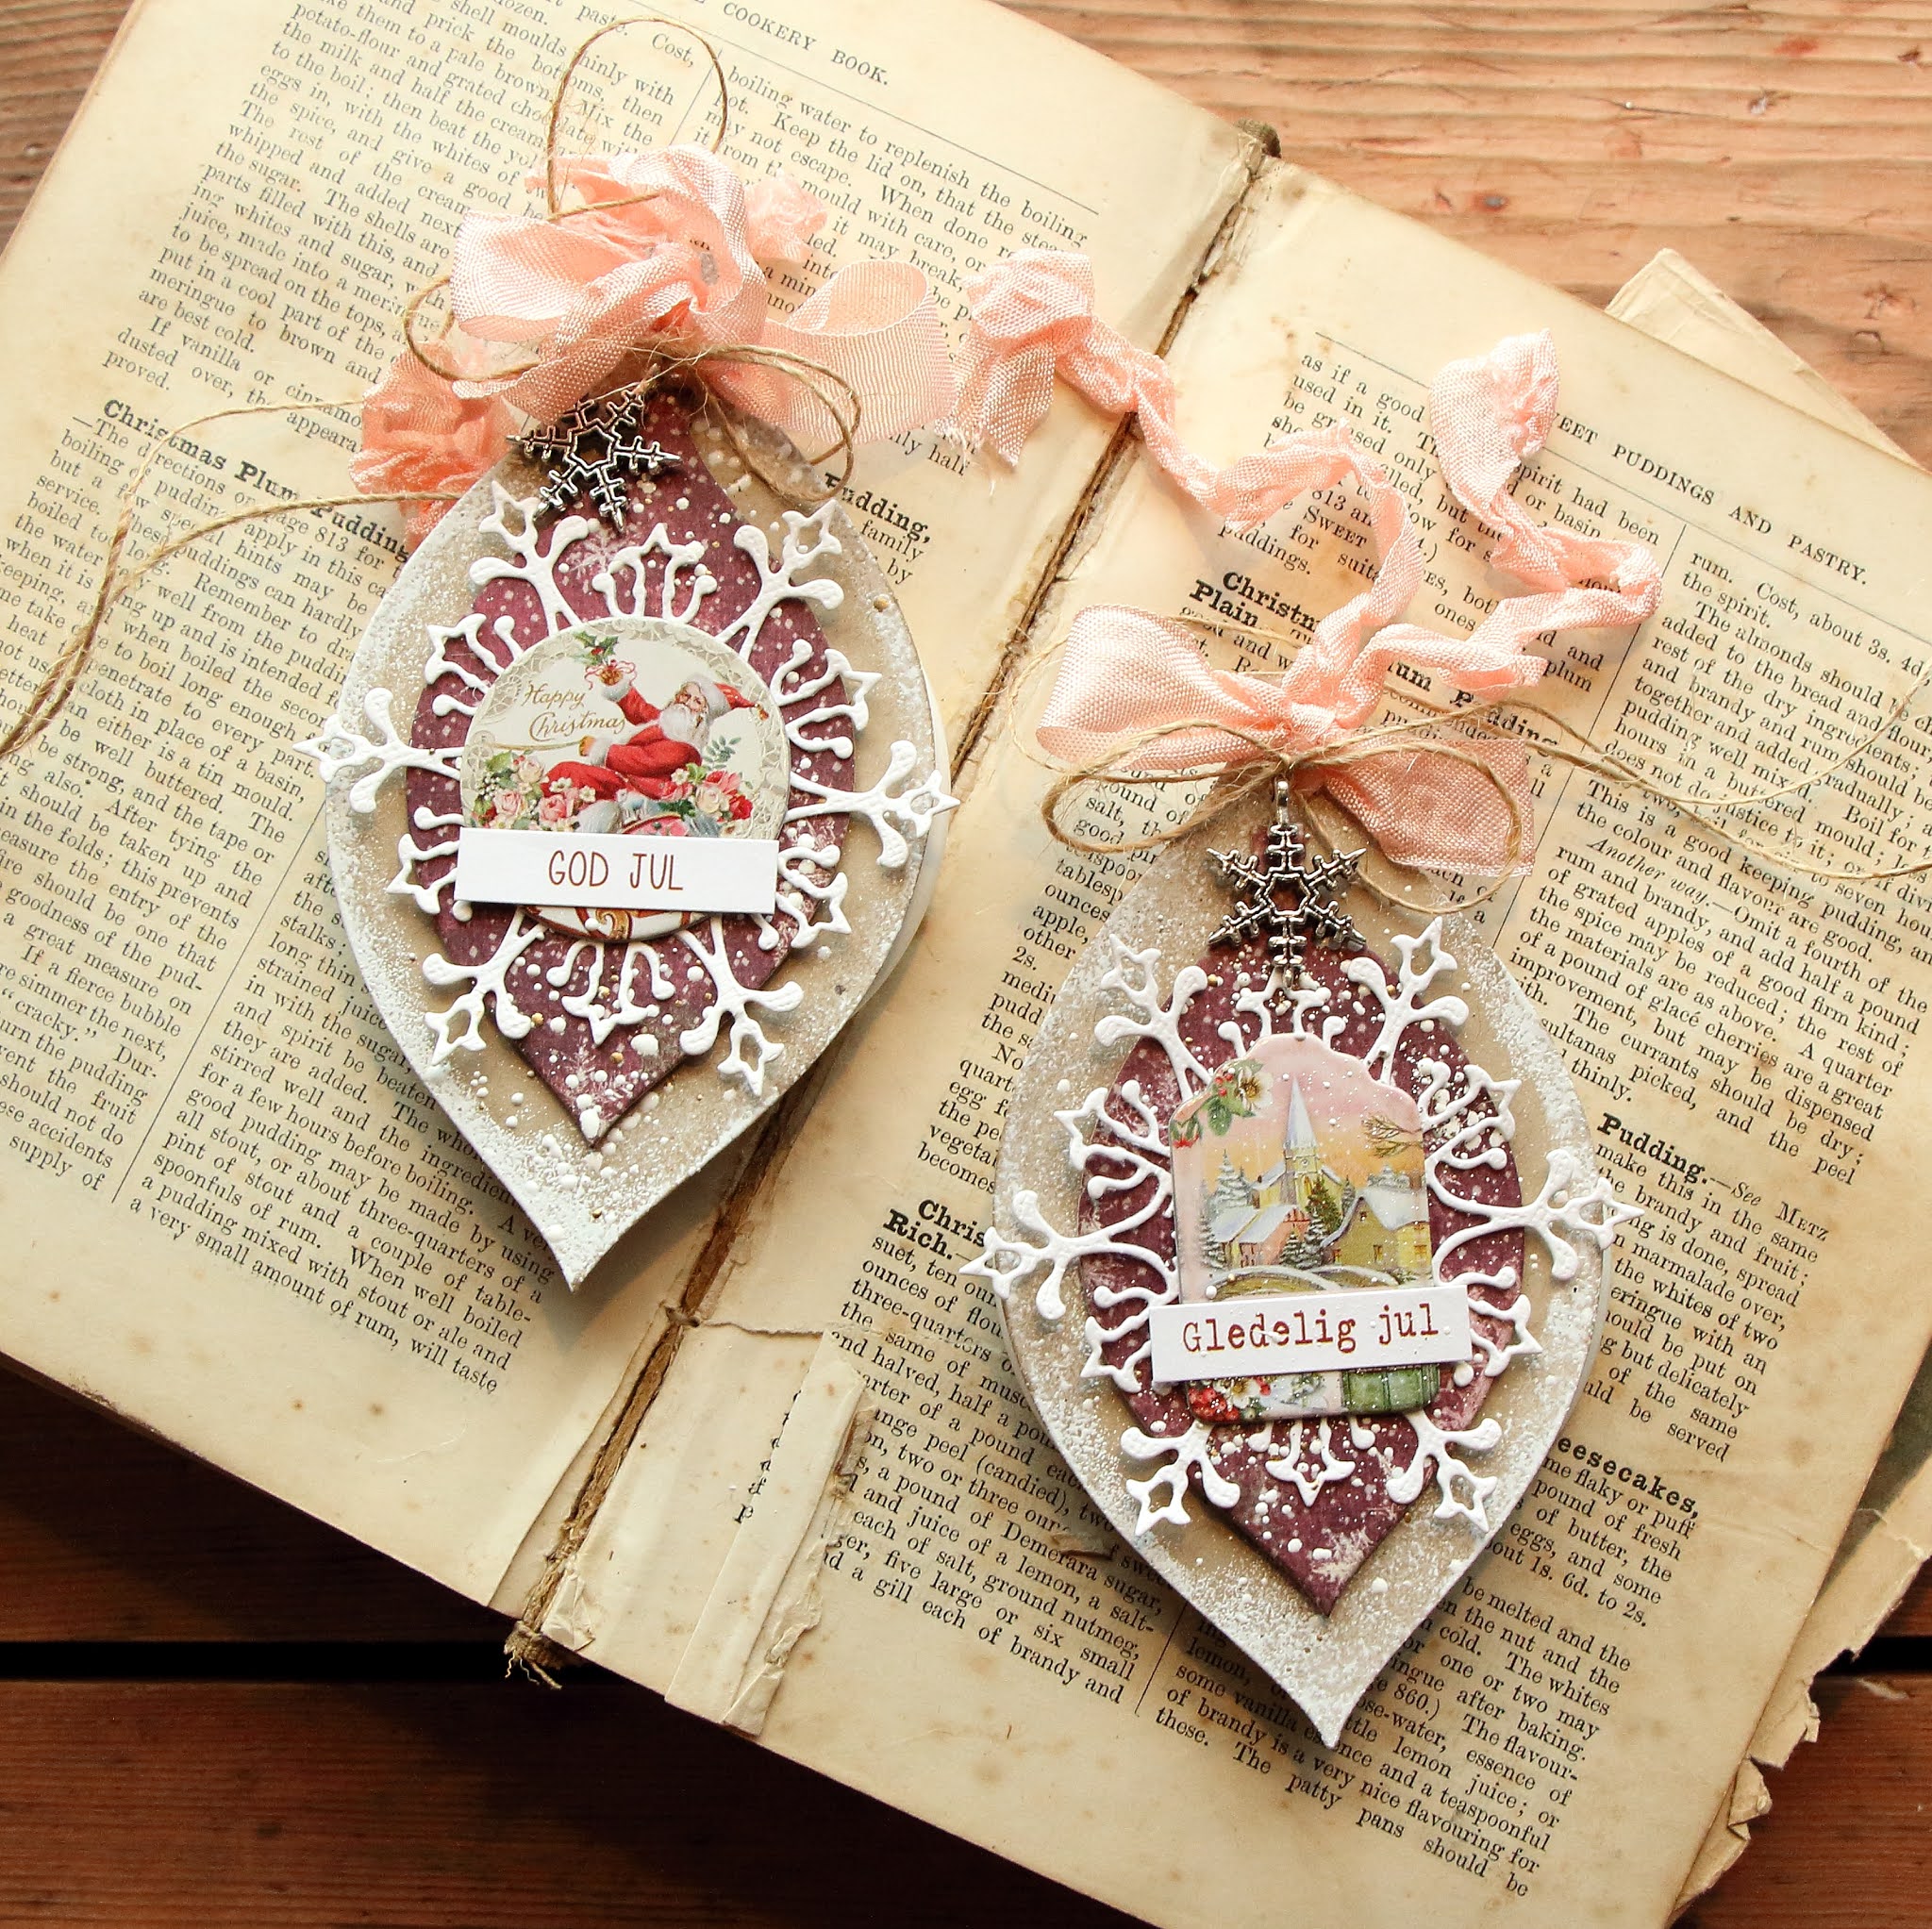

Pakkelappene er laget ved å stanse ut en form med en dies, og dekorer med embossingpulver,  chipboards og charms. Snøkrystallen er en sizzix dies. 


Produkter brukt på kort & pakkelapper kjøpt hos Bikuben:

Ark: 
Dies: 
Forslag til julekule dies:
Dekor:
Medier: 

Jeg deltar i disse utfordringene med kortet mitt: 


Ha en fortreffelig lørdag. 
Scrappeklem fra Yasmin

søndag 17. september 2017

Driftwood Boat - DT Scrapki Wyzwaniowo

Hello lovelies! It's been ages again since I've shared anything I've made.. I've been busy climbing mountains the better part of this summer and haven't really spent much time in my craftroom. I don't really feel guilty about it, but here's a little something I made for Scrapki's last challenge.

The challenge that time was "Home Decor" so I thought I'd make a driftwood boat. It was so much fun to make! I regulary go to the shore and collect random tidbits to use in my crafts and I found some pieces of wood and sticks and thought why not make a boat? So I did. 

I played with papers from 7dots studio, flowers and Charms from Prima. I also painted a bit with the Patina Effect paste.  I also used decorations from Maya Road.

The beautiful lace is from Wild Orchid and where perfect on the sails. The button and the canvas banner is from Maya Road. The twine cording is also from Maya Road.

The charms on this little home decor piece is from Prima's collection "St.Tropez". They are beautifully detailed.

Thank you so much for stopping by my blog today! :) 

fredag 11. august 2017

Steampunkish Card - DT Maya Road

Heellloo!! Finally something is happening on my blog, twice in a week! That's not to shabby. Today I have a Steampunkish card to share with you. I made this card AGES ago for Maya Roads CHA. But I taught today was a good day to share it. I haven't shown it anywhere else before today.

I used papers from Fleur Design on this card, love those papers. It hurt a bit to cut in them. Hahaha.. I used my sewing machine and stitched around the egdes. Added some layers with Maya Road tags and used modeling paste on top.

I made a fun face by using Maya Road glasses and moustache on top of the lightbulb. I also added a button and lightbulb transparency. On top I splashed abit with glimmer glam - stiletto from Tattered Angels. On top of the glasses and moustache I added a bit of Inka Gold - Old Silver.

I'm joining in these challenges with my card: 


Thank you so much for stopping by my blog today! So happy you where here :) 


tirsdag 7. februar 2017

Lollipop Card - DT Wild Orchid Design

Hello hello everyone! Yes! You read it right! I've joined the Wild Orchid Design team and today is my first post for them. I've made a lollipop card for the first time using the brand new "Love Clippings" collection from Prima and Frank Garcia.

I've never made a lollipop card before but I was so much fun to make. I added a bunch of those sweet little Wild Orchid Roses with I LOVE and can't create without. They are pretty much perfect to tuck into small places.

I made this as a valentineish project with the heart and the text on the stickers from the Prima paper collection. The handle I bought at Korthobby.no. Just awesome metals.

I made an inside to the card aswell, you just pull the handle to lift it up, and added the "U are my world" sticker. It fitted perfectly.

Aren't these flowers just soo gorgeous?
I'm joining in these challenges with my card:


Thank you so much for joining me on my blog today. Make sure to stop by the Wild Orchid Blog for more flowery inspiration :) 


torsdag 20. oktober 2016

Autumn Cards - DT Scrapberry's

Good morning everyone! Today I'm back with a couple of cards I made for Scrapberry's this month. I'm getting my mojo back slow and steady and I'm seriously loving it! Tomorrow I'm leaving for a crop, hanging out with awesome ladies and I can't wait. It's going to be a blast! But enough about that.. The cards! Let's start with my moustachy one :)

So on my cards I've used the same products but they turned out slightly different anyways. I've used loads of Scrapberry's products and the papers here are from the "Egde of Town" collection and I've used the 6x6" Paper pack.

I cut out strips of paper and glued them on top of eachother, embellished with Scrapberry's chipboard and cork stickers. Also added a couple of translucent leaves and a air ballon on top. The strings are twine and wire thread from Prima.

After finishing with the embellishment, I splashed on top with glimmer glam - Stiletto and White dylusions ink.

Okey.. next card! :D

Like I said in the start the cards are quite similar, this is a horizontal card with some of the same embellishements. Love how they match :)

I'm joining in these challenges with my cards:


Allright! That's what I had to share today! For more projects with Scrapberry's products head on over to their blog! :) Thanks for stopping by! :)


tirsdag 27. september 2016

Forever in Love with You - Layout DT Flying Unicorn

Hello my sweets! My scrapping is moving along slowly but I finally made something for the Flying Unicorn with the September Kit. The kit was so beautiful with all these lovely autumn colors and Prima's marvellous Rossibelle Collection.

I manily used the kit, but I also added some elements from my own stash, like the straws and the Prima playing cards witch is my new favorite.. they are just soo awesome!

I fuzzy cut loads of elements out of the Rossibelle papers. I also added some layers cut out from the different papers in the collection. I used modeling paste in the background. I added some of the flowers and some twine. I painted and splashed a bit with some Colorbloom and dylusions white.


There's a new kit for sale in just a couple of days. Make sure to get yours while you can. They are limited :)

Thank you so much for stopping by my blog today and make sure to come back tomorrow. I will have another share for you. Hugs!

onsdag 23. september 2015

Into the great Unknown - Card - DT Scrapberry's

Back again today with a new card to share with you. I posted this on the Scrapberry's blog a couple of days ago, but haven't had the time to share it here on the blog.


I've played with the Antique shop collection and made this masculine maritime card. I've added loads of twine to make the statement of the Maritime with the embellishements a bit stronger. 

The card I made with a folding technique I really love. It's super easy and very decorative. You fold this out of a single sheet of paper and it can what ever size you'd like to be. It makes a pocket you can put a card or what every you'd like in it. I thought the title from 7dots Studio was perfect on my card. 
The boat wheel is a resin from Scrapberry's and the other natuical compass is a metalcharm from Korthobby.no.  I've diecuted the boat out and added a scallop boarder on the back. Really decorative. 


With this card I'm joining in these challenges: 


 Thank you so much for joining me today. I hope you liked my card.

tirsdag 22. september 2015

A sweet Card - DT Marion Smith Designs

Hello Everyone.. I'm sorry to admit that my blog this month has been quite neglected. I've had sooo seriously much stuff to do and It doesn't seem to stop until the mid of October. But I'm here today to show you my latest project for Marion Smith Designs.

I've made a scrap card.. I love to make those out of small pieces you have left from other projects. Why throw away something when you can make a card from it. 

Isn't this resin rose just so lush? I really wanted to put this on a card. It makes the card really heavy, so it wouldn't be something you could mail to your friend without beeing ruined at the post office. I added some microbeads and pearls, some other flowers and some twine. 


This little bling heart is also a Marion Smith Desings embellishement. Soo sweet.

I'm joining in these challenges with this card:

Thank you so much for joining me here on my blog today! I hope to get my blogging together so I can show you some of my more projects. :) 


onsdag 17. juni 2015

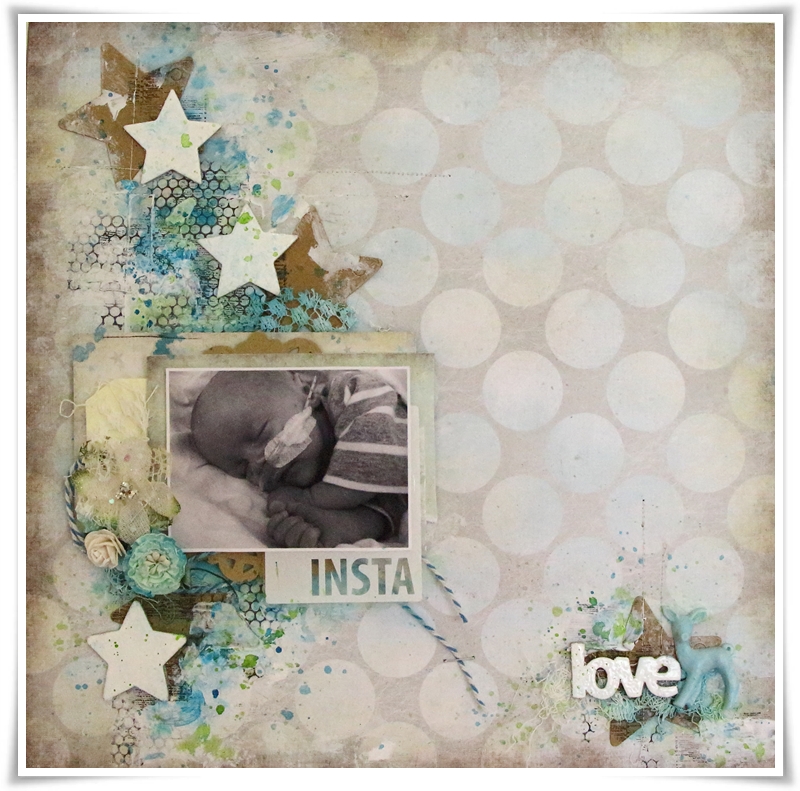
Insta Love Layout - DT Maya Road

It's my first ever blogpost at the Maya Road blog today and I'm beyond excited because it's also my first ever blogpost with a tutorial video!! My hubby fixed a webcam for me so I had to try it out. This time I made a layout - of course mixed media.

I had to scrap this precious picture of my youngest. He was born 7 weeks prematurely and had to get some help and medical attention the first week of his life.

I've used loads of Maya Road products on my page like Maya Mist. Chipboards and kraft elements.


I've actually used a sketch I found at Art-Piaskownica blog and used it as a refrence point for my layout. The papers are the newest from 13@rts and Olga Heldweins collection. Here's the sketch:


Well, time to present my first ever video tutorial! Pleease be gentle with me :P 


On the Maya Road blog you can find a full list of supplies I've used. Thank you so much for stopping by me today and have great crafty day! :)